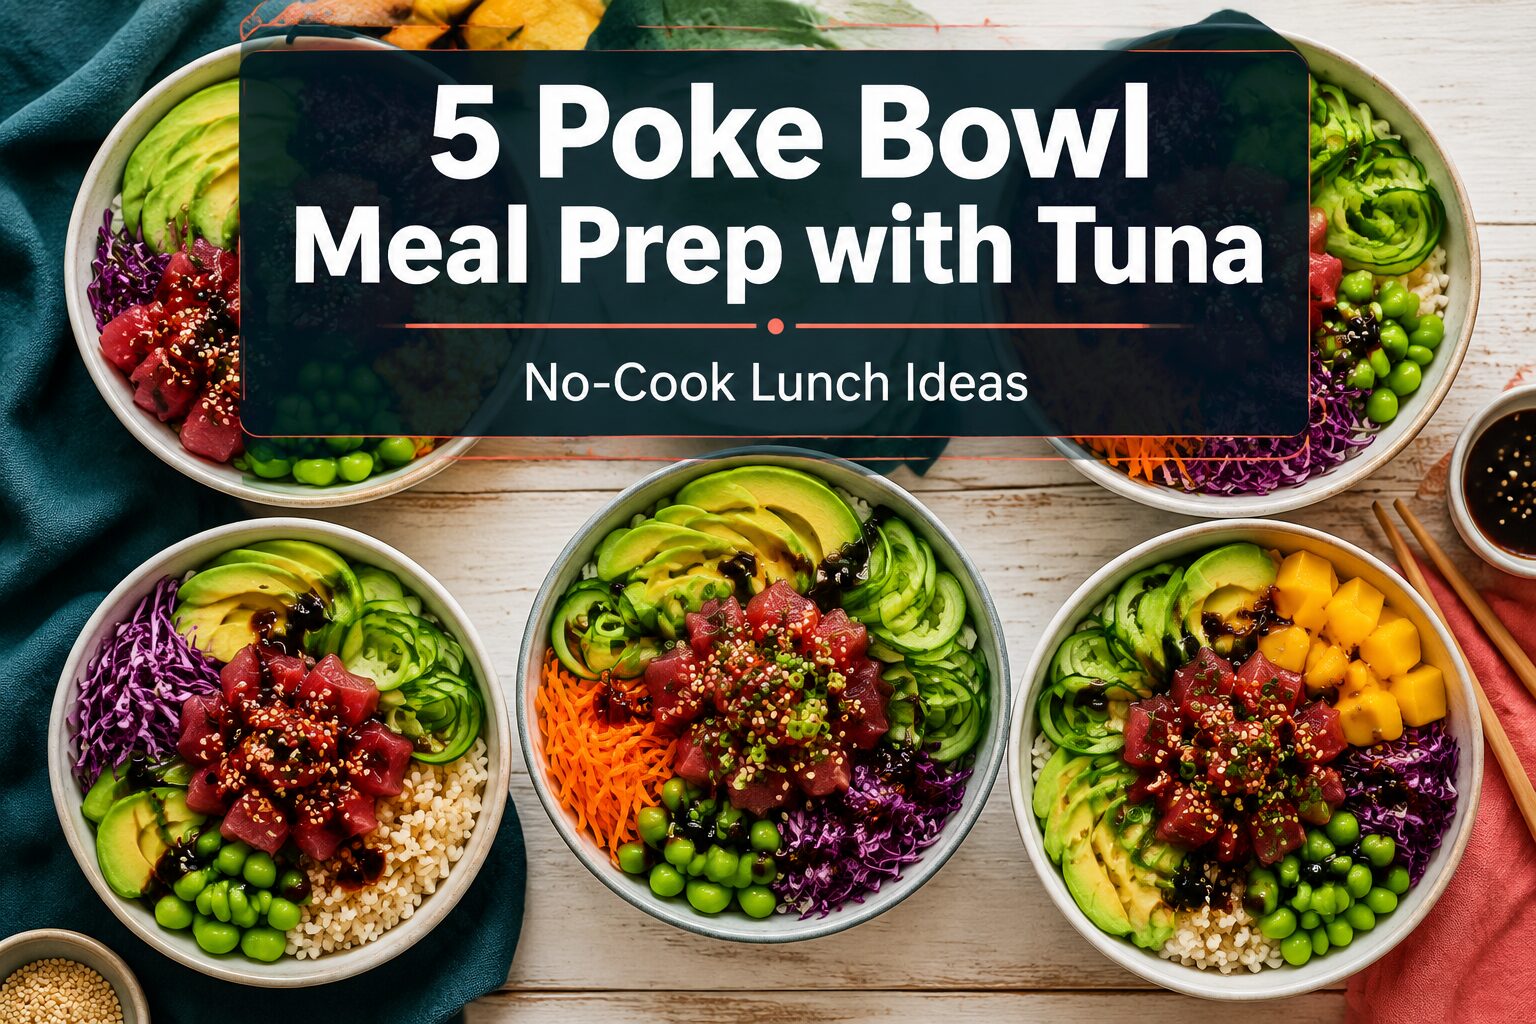
For a high-protein lunch you can make once and eat for 3 days, poke bowl meal prep with tuna delivers 38 grams of protein per bowl in under 30 minutes. Use fresh ahi for the best texture, or canned albacore for a pantry-friendly version that preps just as well.
This post contains affiliate links. If you buy through them, I earn a small commission at no extra cost to you.
Table of Contents
- Fresh Ahi vs Canned Tuna: Which to Use
- Ingredients for Tuna Poke Bowls
- Poke Sauce Recipe
- Bowl Assembly Instructions
- Macro Breakdown Per Bowl
- Storage and Food Safety
- The Budget Canned Tuna Version
- Common Mistakes to Avoid
- FAQ
- Related Articles
Fresh Ahi vs Canned Tuna: Which to Use
Fresh sushi-grade ahi tuna gives the best texture and flavor, but it should be eaten within 24 hours of purchase. That makes it a great choice for a 1–2 day prep, but not for a full 3-day week of lunches.
Canned albacore tuna is already cooked during the canning process, which makes it safe to prep and store for up to 3 days. A can of solid white albacore tuna costs about $1.50 for 5 ounces and delivers 25–28g protein – making it the more practical and budget-friendly choice for most meal prep situations.
If you prefer a cooked fish option that holds the full 4 days, the salmon meal prep guide builds a similar flavor profile using air-fried salmon.
Ingredients for Tuna Poke Bowls
This recipe builds 4 bowls. Prep time: 20 minutes. Cook time: 20 minutes (for rice).
| Ingredient | Amount | Notes |
|---|---|---|
| Ahi tuna (sushi-grade) | 1 lb | OR two 5oz cans solid white albacore tuna |
| Sushi rice (dry) | 2 cups | Makes ~4 cups cooked; swap cauliflower rice to cut carbs |
| Edamame (shelled, frozen) | 1.5 cups | Thaw overnight or microwave 3 minutes |
| Cucumber | 1 large | Sliced thin |
| Avocado | 2 medium | Slice at serving time only |
| Sesame seeds | 2 tbsp | Topping |
| Scallions | 4 stalks | Chopped, topping |
| Pickled ginger | 4 tbsp | Optional |
Poke Sauce Recipe
Make this first so the tuna has time to absorb flavors while you cook the rice. The sauce keeps in the fridge for 1 week in a sealed jar.
| Ingredient | Amount |
|---|---|
| Low-sodium soy sauce | 3 tbsp |
| Sesame oil | 1 tbsp |
| Rice vinegar | 1 tbsp |
| Sriracha | 1 tsp |
| Honey | 1 tsp |
| Ginger (grated) | 1/2 tsp |
Whisk all ingredients together. Taste and adjust – more sriracha for heat, more honey for balance. This sauce stores in a sealed jar for up to 1 week in the fridge.
Bowl Assembly Instructions
Fresh Ahi Version
- Buy sushi-grade ahi tuna the day of use or the night before. Don’t use tuna that doesn’t say “sushi-grade” or “sashimi-grade” on the label.
- Cut tuna into 3/4-inch cubes. Place in a bowl and toss with 2 tablespoons of poke sauce. Marinate in the fridge for 15–30 minutes – no longer.
- Cook sushi rice: rinse 2 cups dry rice, add to 4 cups water. Bring to a boil, reduce to low, cover, and cook 18 minutes. While warm, stir in 2 tbsp rice vinegar, 1 tbsp sugar, and 1/2 tsp salt.
- Divide rice into 4 airtight containers. Store marinated tuna in a separate airtight container.
- Pack cucumber, thawed edamame, and scallions in a separate container. Leave avocados whole until serving.
Canned Tuna Version
- Drain two 5oz cans of solid white albacore tuna thoroughly.
- Toss drained tuna with 2 tablespoons poke sauce and 1 teaspoon sesame oil. Let sit for at least 10 minutes so it absorbs the seasoning.
- Cook and season rice the same way as the ahi version above.
- Divide rice into 4 containers. Store seasoned canned tuna in its own separate container.
- Pack vegetables the same way as the ahi version.
Macro Breakdown Per Bowl
| Version | Protein | Net Carbs | Fat | Calories |
|---|---|---|---|---|
| Fresh ahi + sushi rice | 38g | 52g | 14g | 480 |
| Canned albacore + sushi rice | 32g | 52g | 11g | 440 |
| Fresh ahi + cauliflower rice | 38g | 14g | 14g | 325 |
| Canned albacore + cauliflower rice | 32g | 14g | 11g | 285 |
Cauliflower rice saves 38g net carbs per bowl. The tuna and poke sauce carry the flavor regardless of which base you choose. The meal prep guide has a full comparison of low-carb base options.
Storage and Food Safety
Food safety matters more with tuna poke than with most meal prep. Follow these storage rules exactly.
| Component | Storage Method | Max Days in Fridge |
|---|---|---|
| Fresh ahi tuna (marinated) | Airtight container, separate from rice | 1 day only |
| Canned tuna (seasoned) | Airtight container, separate from rice | 3 days |
| Cooked sushi rice | Airtight container | 3 days |
| Edamame (thawed) | Airtight container | 4 days |
| Sliced cucumber | Separate container | 3 days |
| Avocado (whole, uncut) | Counter or fridge | Slice at serving time |
If using fresh ahi: only prep the amount you’ll eat within 24 hours. Don’t batch 4 bowls of raw ahi for the week. Both safety and texture degrade after day 1.
If using canned tuna: prep all 4 portions on Sunday and eat through Wednesday. Store the seasoned tuna in a separate container from the rice and vegetables at all times.
Never leave assembled poke bowls at room temperature for more than 2 hours. For secure component separation during transport, airtight containers with multiple sections prevent mixing in the bag.
The Budget Canned Tuna Version
A canned tuna poke bowl costs about $3.50 per serving. A fresh ahi version runs $6–$9. The protein gap is real but manageable – solid white albacore gives 25–28g protein per 5oz versus 38g for fresh ahi, and the texture holds up well when seasoned.
Use solid white albacore in water, not oil – it has a firmer texture than chunk light tuna and absorbs sauce better. Drain it completely before seasoning. Excess water dilutes the poke sauce and makes the bowl watery.
To get canned tuna as close to the fresh version as possible: season it with sesame oil and soy sauce right after draining, add a pinch of grated ginger, and serve it cold. Warming canned tuna poke kills the texture.
Common Mistakes to Avoid
Marinating fresh ahi for too long. More than 30–45 minutes in soy sauce breaks the texture down. The acid and salt start to chemically cook the fish. Toss it in sauce no more than 30 minutes before eating.
Prepping raw ahi for more than 1 day. Fresh ahi must be eaten within 24 hours of purchase. If you want a 3-day prep, use canned tuna or switch to a fully cooked protein.
Cutting avocado during prep. Avocado browns within 4–6 hours once cut. Keep avocados whole and slice them right before eating. A squeeze of lemon slows browning if you need to cut slightly ahead.
Using regular grocery store tuna as sushi-grade. Unless the label says “sushi-grade” or “sashimi-grade,” don’t use it raw. If in doubt, use canned tuna instead.
Mixing rice, fish, and vegetables together during storage. The rice absorbs moisture overnight and everything turns soft and blended. Keep components separate and assemble in the morning before you leave for work.
FAQ
Is canned tuna safe for a poke bowl?
Yes. Canned tuna is fully cooked during the canning process, so raw fish food safety concerns don’t apply. The texture is different from fresh ahi – denser and softer – but it works well in a bowl with rice and vegetables. Solid white albacore tastes closest to fresh tuna.
How long does poke bowl meal prep with tuna last in the fridge?
Canned tuna: 3 days when stored separately from rice and vegetables. Fresh ahi: 1 day only after purchase. Cooked sushi rice lasts 3 days. Prep on Sunday with canned tuna and eat through Wednesday with no food safety concerns.
Can I use frozen ahi tuna for meal prep?
Store-bought sushi-grade frozen ahi can be thawed and used for poke. Thaw it in the fridge overnight – never at room temperature. Use within 24 hours of thawing and don’t refreeze after thawing. If the package doesn’t say sushi-grade when frozen, cook it instead of eating it raw.
Can I use cauliflower rice instead of sushi rice?
Yes, and it saves about 38g net carbs per bowl. The texture is lighter and less sticky, but the poke sauce and tuna carry the bowl. Use about 1 cup of cauliflower rice per bowl. Cook or microwave it before adding to the container so it’s not watery.
What’s the protein difference between fresh ahi and canned tuna?
Fresh ahi gives 38g protein per 5oz. Solid white albacore canned tuna gives 25–28g per 5oz. Chunk light tuna gives about 22g per 5oz. Use albacore if protein content is a priority. The meal prep guide has a full protein comparison table across common prep proteins.
Related Articles
- Protein Bowl Recipes – the full collection of high-protein bowl builds
- Meal Prep Guide – batch cooking proteins for the full week
- Airtight Containers – best options for multi-component bowl prep
- Salmon Meal Prep – cooked fish option that holds safely for 4 days
Written by Maya Carter, meal prep writer and home cook at BeefSteakVeg.
Maya Carter | Editorial Policy
BeefSteakVeg shares general food and meal prep information only. This is not medical or nutritional advice.